Android开发技巧--UI
自定义的ListView
移动设备上的UI设计,用的最多的就是listView,从QQ、微信到一些新闻客户端,都是上下标题栏加上中间列表的结构,这样可以充分的利用移动设备并不富裕的空间,高效的显示更多的信息。Android中通过自定义的Adapter可以根据需要对ListView进行定制。
假设要在一个ListView中的每个条目展示不同的Fruit的名称和图片,首先新建一个Fruit类表示Fruit对象,其中name成员变量表示水果名,imageId表示对应的Fruit的图片资源id1
2
3
4
5
6
7
8
9
10
11
12
13
14
15public class Fruit {
private String name;
private int imageId;
public Fruit(String name, int imageId) {
this.name = name;
this.imageId = imageId;
}
public String getName() {
return name;
}
public int getImageId() {
return imageId;
}
}
接着需要定义一个对应于上面Fruit类的布局文件,作为ListView中每个条目的布局文件。下面就可以定义一个最基本的没有优化的适配器,这里是通过继承指定泛型为Fruit的ArrayAdapter1
2
3
4
5
6
7
8
9
10
11
12
13
14
15
16
17
18
19public class FruitAdapter extends ArrayAdapter<Fruit> {
private int resourceId;
public FruitAdapter(Context context, int itemViewResourceId,List<Fruit> objects) {
super(context, itemViewResourceId, objects);
resourceId = itemViewResourceId;
}
@Override
public View getView(int position, View convertView, ViewGroup parent) {
Fruit fruit = getItem(position); // 获取当前项的Fruit实例
View view = LayoutInflater.from(getContext()).inflate(resourceId, null);
ImageView fruitImage = (ImageView) view.findViewById(R.id.fruit_image);
TextView fruitName = (TextView) view.findViewById(R.id.fruit_name);
fruitImage.setImageResource(fruit.getImageId());
fruitName.setText(fruit.getName());
return view;
}
}
可以看到,在构造函数中依次传入context对象,每个条目的布局文件的资源id,需要显示的所有Fruit对象组成的List
但是,可以观察到大多数自定义的适配器中的getView方法都不是如此简单粗暴。上面的写法每次调用getview方法是都需要加载一次布局文件,这是多余了,完全可以利用convertView参数进行优化1
2
3
4
5
6
7
8
9
10
11
12
13
14
15@Override
public View getView(int position, View convertView, ViewGroup parent) {
Fruit fruit = getItem(position);
View view;
if (convertView == null) {
view = LayoutInflater.from(getContext()).inflate(resourceId, null);
} else {
view = convertView;
}
ImageView fruitImage = (ImageView) view.findViewById(R.id.fruit_image);
TextView fruitName = (TextView) view.findViewById(R.id.fruit_name);
fruitImage.setImageResource(fruit.getImageId());
fruitName.setText(fruit.getName());
return view;
}
convertView参数用于将之前加载好的布局进行缓存,所以我们可以在加载布局文件之前进行判断,如果convertView不为空就不要再去利用LayoutInflater去加载布局。这里需要说的就是convertView,Android SDK中这样讲参数 convertview :
the old view to reuse, if possible. Note: You should check that this view is non-null and of an appropriate type before using.
If it is not possible to convert this view to display the correct data, this method can create a new view.
为了节省内存,不至于让listview中的每个item都驻留在手机的内存中,Android提供了一套Recycler机制,当一个ListView初次新建时,getview中的convertView是null,这时用户开始滚动listview,当其中一个item被滚出屏幕后,android就将其保存在Recycler中而不是内存中。再次调用getview方法时,传入的convertView就是被滚出屏幕的item的布局了,只需要重新设定布局组件的数据即可。
下面,可以进一步优化,我们发现每次调用getView方法时,都会使用findViewById方法得到布局文件中每一个组件才能为其赋值。这也是十分影响效率的。1
2
3
4
5
6
7
8
9
10
11
12
13
14
15
16
17
18
19
20
21
22
23
24@Override
public View getView(int position, View convertView, ViewGroup parent) {
Fruit fruit = getItem(position);
View view;
ViewHolder viewHolder;
if (convertView == null) {
view = LayoutInflater.from(getContext()).inflate(resourceId, null);
viewHolder = new ViewHolder();
viewHolder.fruitImage = (ImageView) view.findViewById(R.id.fruit_image);
viewHolder.fruitName = (TextView) view.findViewById(R.id.fruit_name);
view.setTag(viewHolder); // 将ViewHolder存储在View中
} else {
view = convertView;
viewHolder = (ViewHolder) view.getTag(); // 重新获取ViewHolder
}
viewHolder.fruitImage.setImageResource(fruit.getImageId());
viewHolder.fruitName.setText(fruit.getName());
return view;
}
class ViewHolder {
ImageView fruitImage;
TextView fruitName;
}
通过定义内部类ViewHolder对布局文件的控件进行缓存,当convertView为空是我们创建一个viewHolder对象,将布局文件的组件都保存在其中。接着调用view的setTag方法将viewHolder对象保存在其中。在convertView不为空时,即可用从Recycler中取出旧的布局文件时,我们在通过view的getTag方法将布局文件的组件取出,以便接下来对其进行赋值。
这样,如果convertview是第一次展示我们就创建新的Holder对象与之绑定,并在最后通过return convertview返回,去显示;如果convertview 是回收来的那么我们就不必创建新的holder对象,只需要把原来的绑定的holder取出加上新的数据就行了。
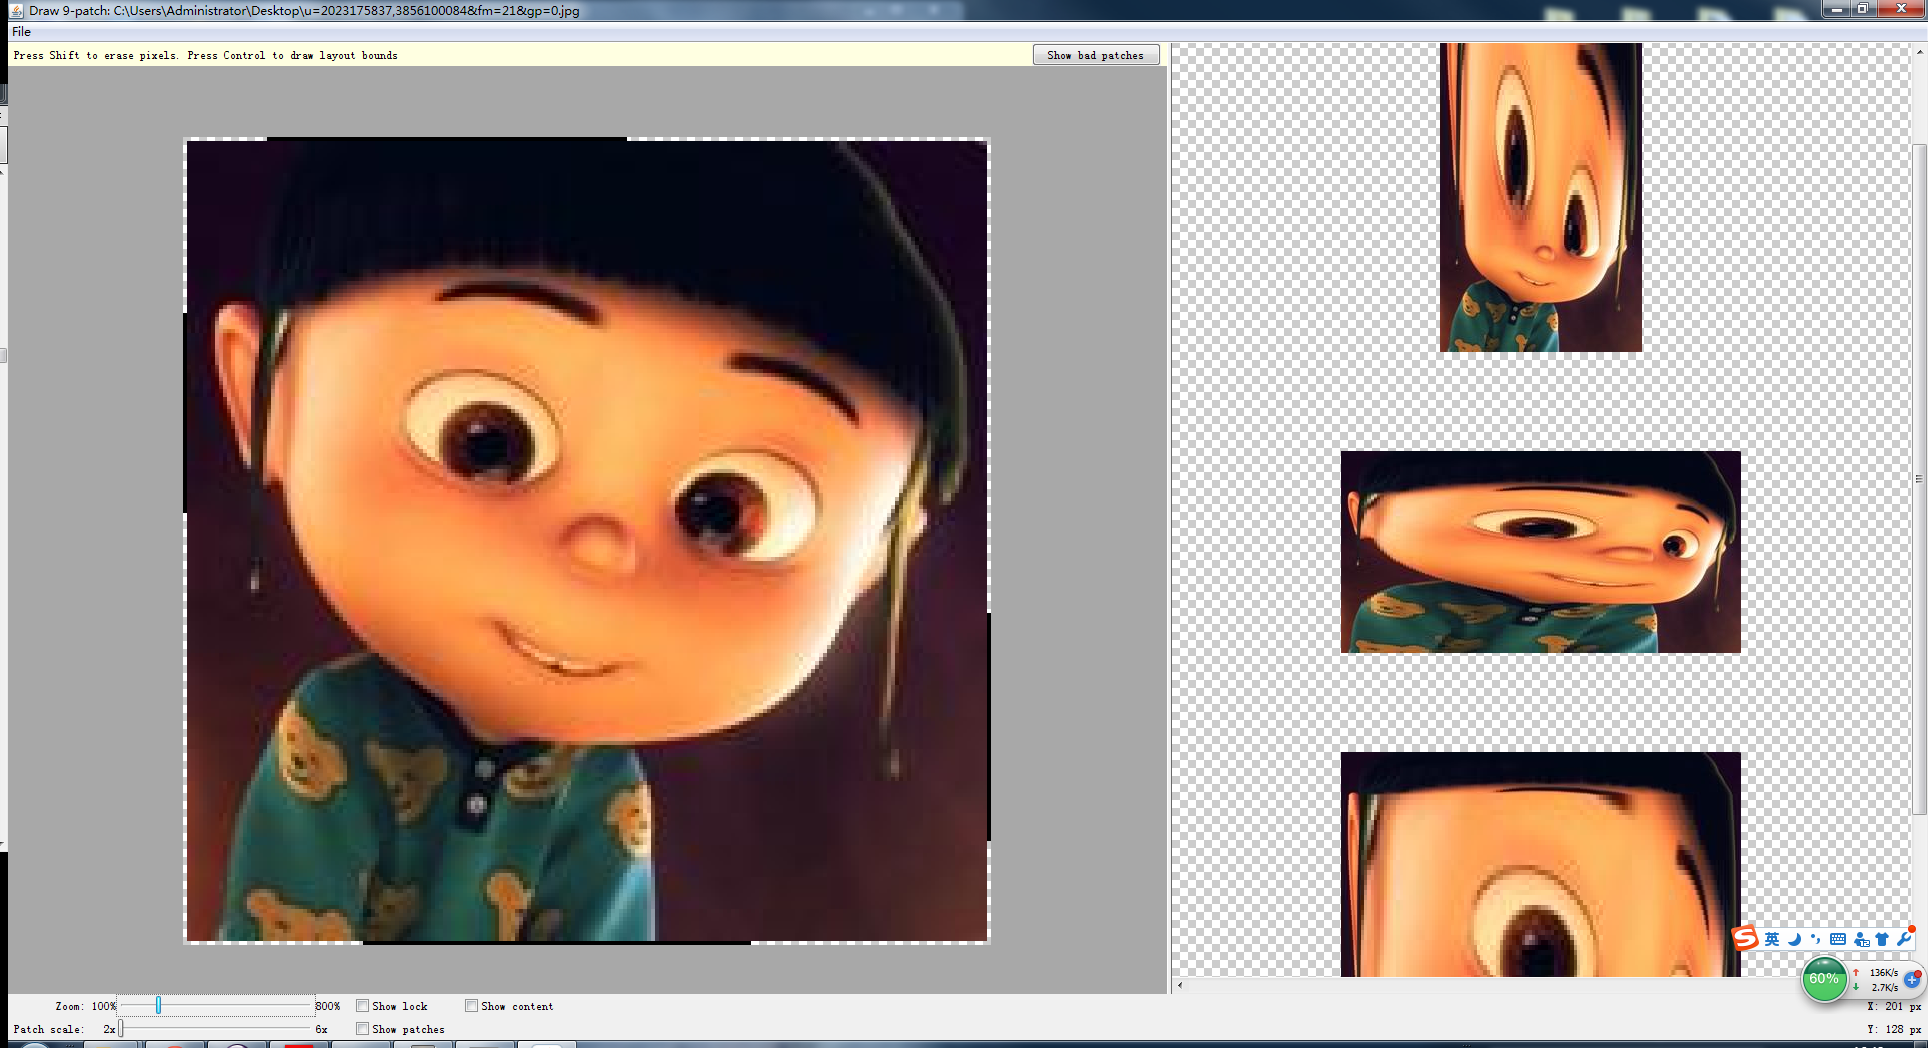
制作Nine-Patch图片
有时候,我们需要制定一张图片那些部分是可以拉伸的,而不希望其均匀的被拉伸。这时候我们就可以利用android sdk中提供的一个工具,首先找到sdk根目录,打开其中的tools文件夹,运行draw9patch.bat,将要编辑的图片加载到其中。接着,在图片的四个边框绘制一个个的小黑点,在上边框和左边框绘制的部分就表示当图片需要拉伸时就拉伸黑点标记的区域,在下边框和右边框绘制的部分则表示内容会被放置的区域。